Bring a sleek, long‑lasting surface coating into your space — a finish designed to look great today and stand strong for years to come.
Our Process
↓
-
Professional guidance every step of the way. We take the time to understand your needs, explain your options, and make the process smooth from start to finish.
-
When you reach out, we start with a quick screening to understand exactly what your project needs. We’ll ask about the type of concrete you have, its current condition, any special features like verticals or tight corners, and your address. This gives us the information we need to point you in the right direction and prepare a plan tailored to your space.
-
Next, we schedule a visit to your property to see the floor in person. During this visit, we take precise measurements and closely inspect the condition of your concrete. This hands‑on assessment gives us the details we need to prepare an accurate proposal and a quote you can rely on.
-
After our visit, we prepare a detailed proposal and quote for you to review. Once you approve the proposal, we add your project to our schedule and walk you through the next steps so you know exactly what to expect.
-
Your floor is installed through a detailed, step‑by‑step process. The steps below walk you through how we prep the concrete, apply the coating system, and finish the surface for a clean, durable result.
-
To ensure strong adhesion and long‑lasting results, we begin by thoroughly preparing the concrete surface. Using diamond grinders connected to vacuums, we remove dirt, residue, and surface contaminants while keeping dust to a minimum. This step creates a clean, properly profiled surface that’s ready for coating.
-
Pits and cracks are repaired using professional crack fillers to create a smooth, even surface. This step ensures the coating goes on uniformly and helps improve the long‑term durability of your floor.
-
The basecoat is applied to create a strong foundation for the coating system. This layer bonds tightly to the prepared concrete and provides the durability needed for a long‑lasting floor.
-
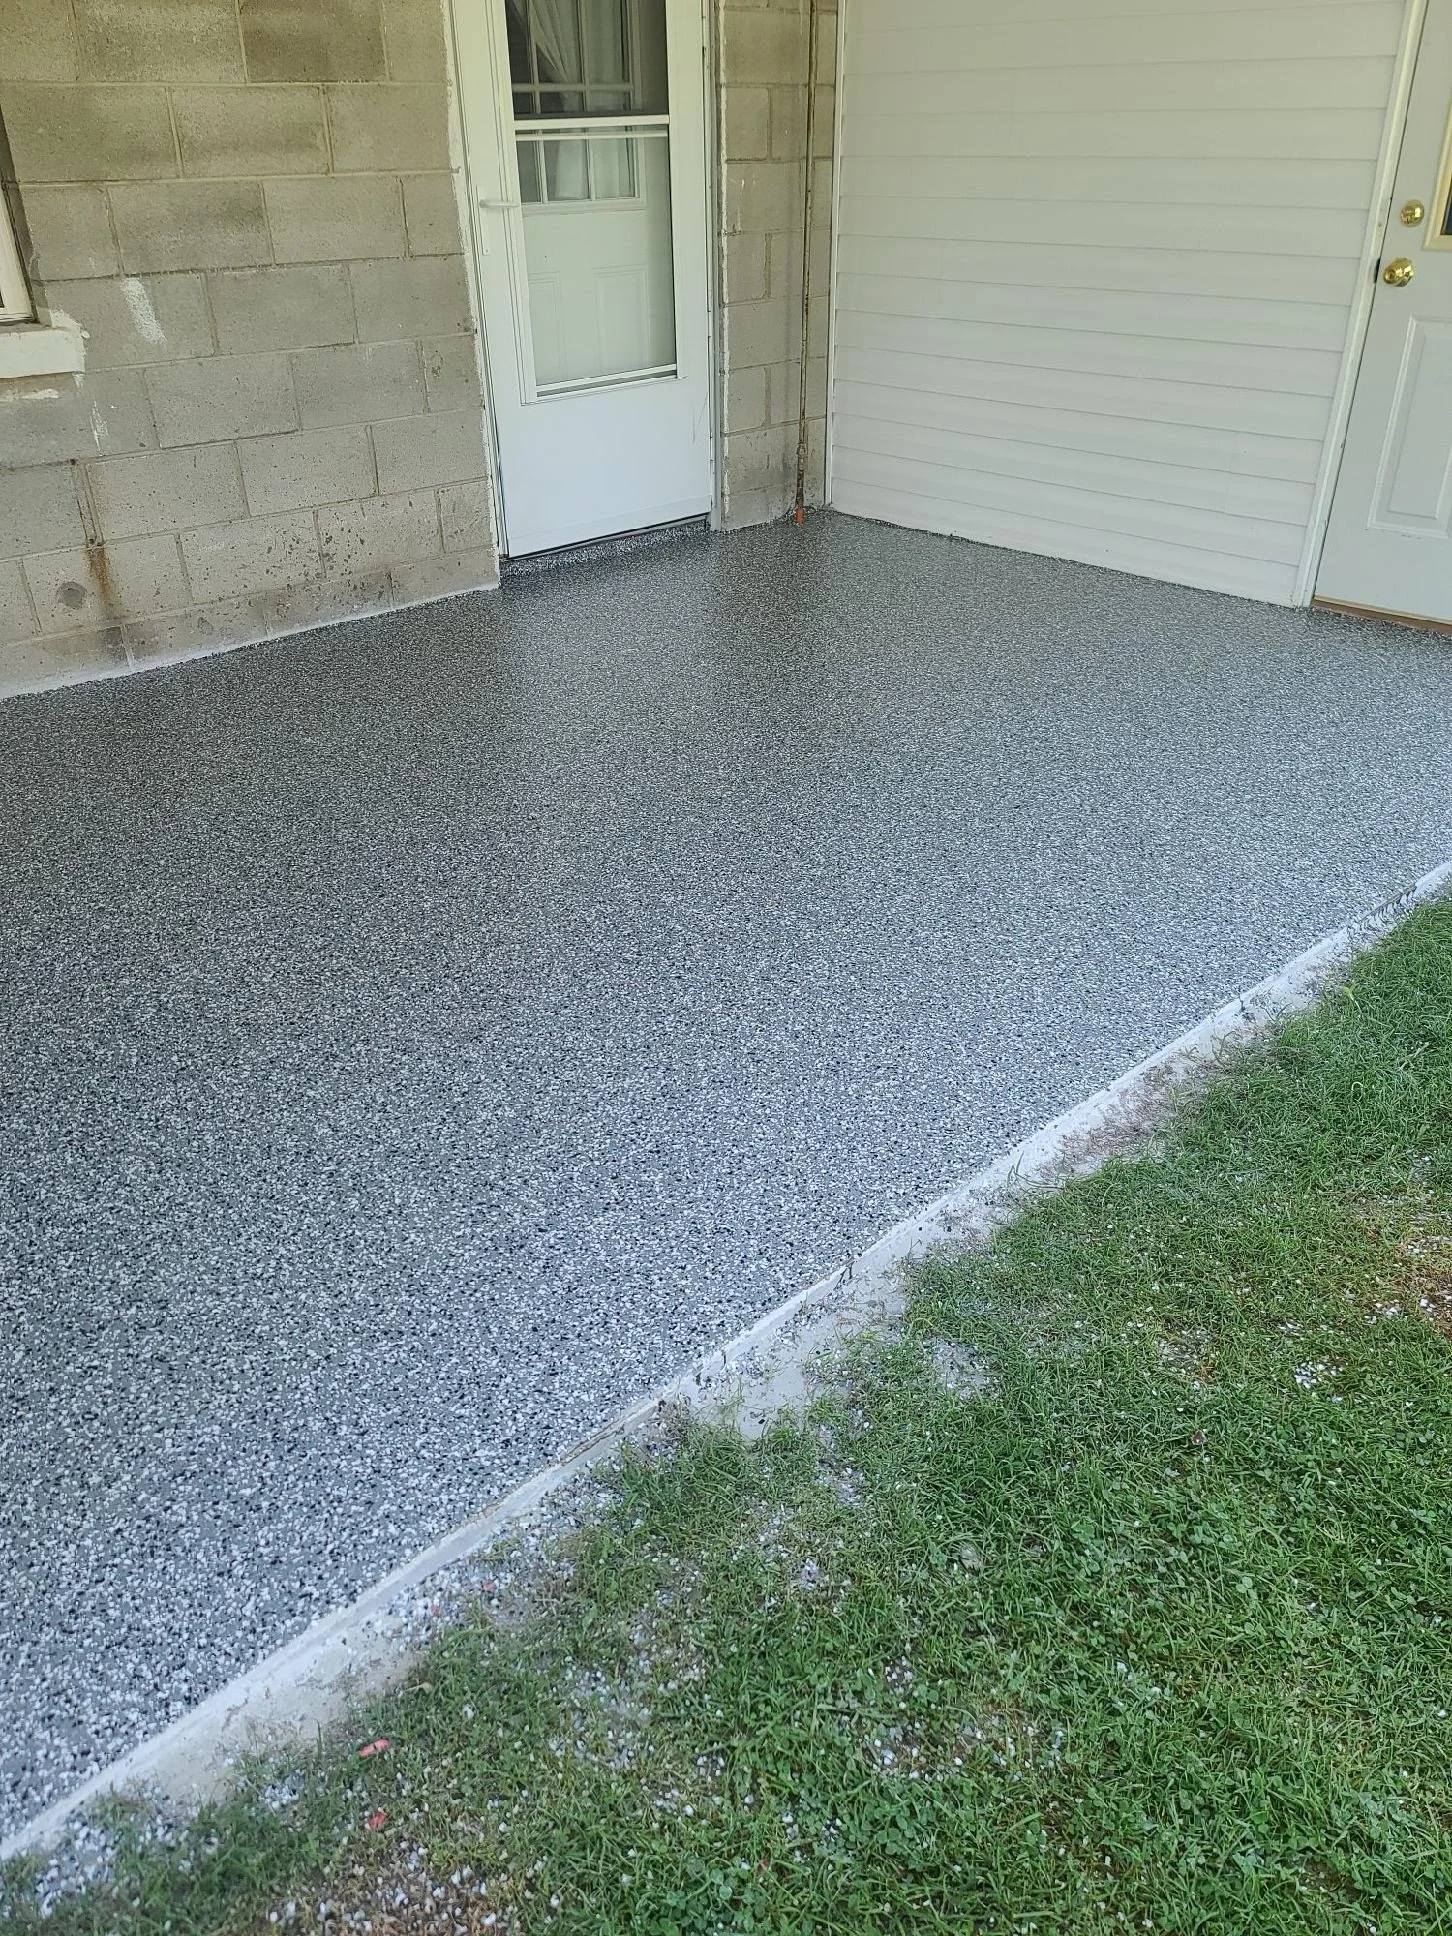
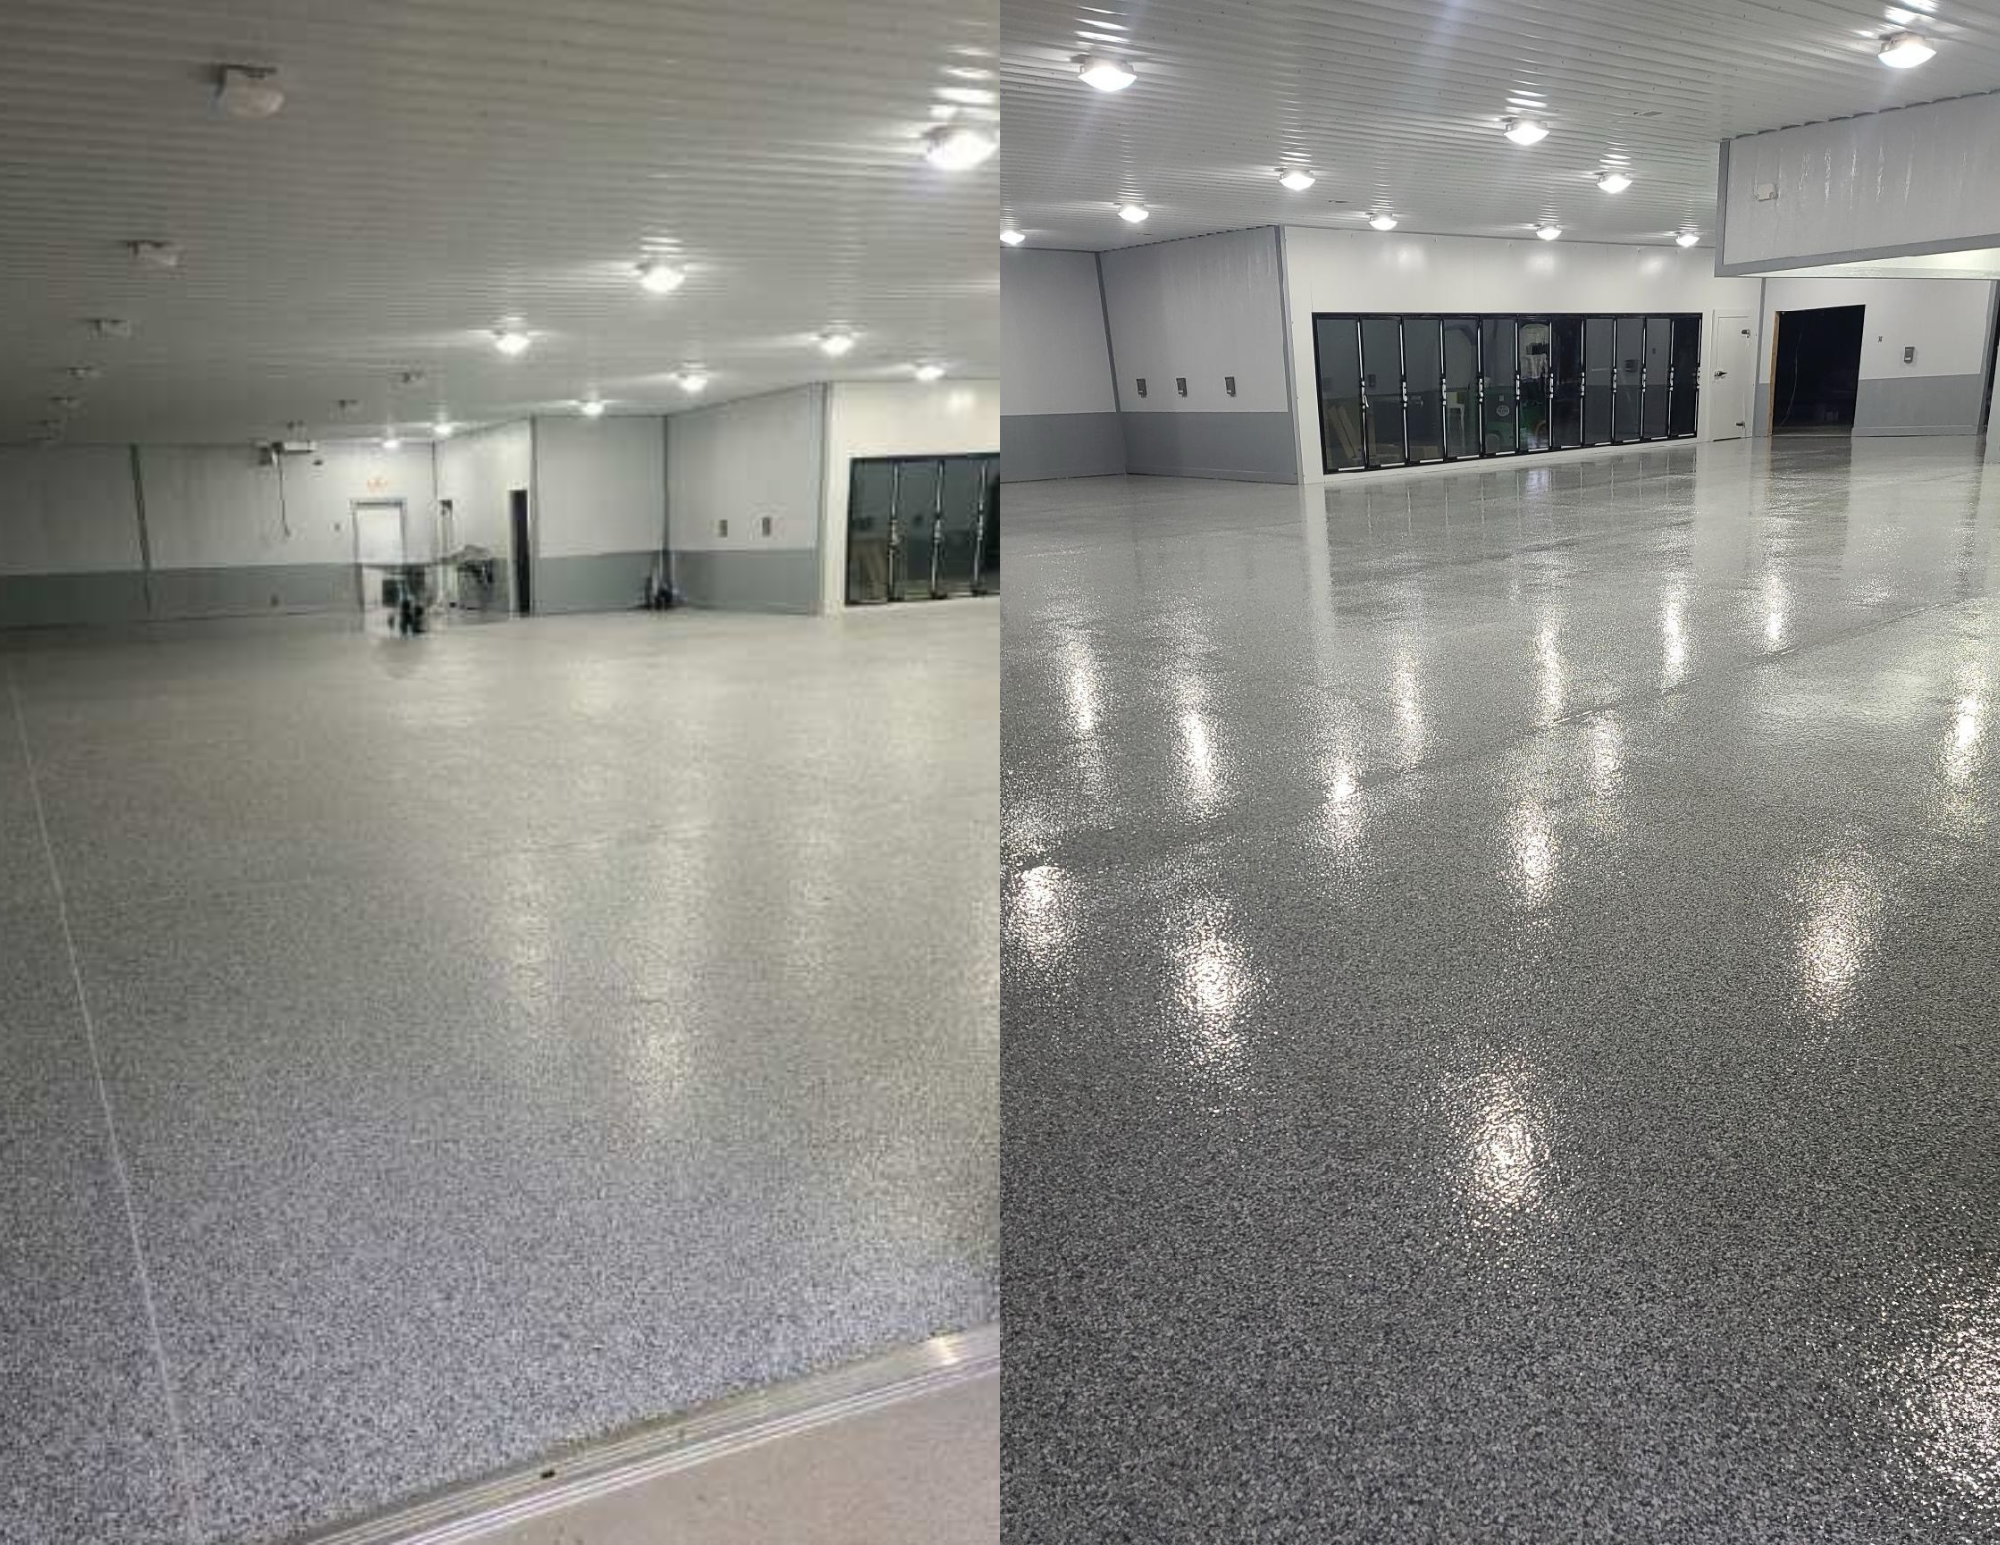
Chips are hand‑broadcast into the wet basecoat to add color, texture, and visual depth. This step gives the floor its signature look and helps create a surface that feels more grounded underfoo
-
After the basecoat cures, the surface is scraped with steel blades and vacuumed to remove any loose or standing chips. This creates an even, consistent texture so the topcoat goes on smoothly.
-
The final step is applying the UV‑stable topcoat using a squeegee and roller to achieve an even, consistent finish. This layer seals the system, protects the floor, and creates a surface that’s easy to clean and maintain.
-
When your floor coating is complete, we walk the space with you to make sure everything meets your expectations. Once the project is finished and approved, the remaining balance is collected. You’re left with a clean, durable floor and a team that stands behind the work.